Bathroom Course Manual-8
LESSON 3-PROCEDURES FOR CLEANING A BATHROOM
REPEAT CLEAN
ENGLISH
PRODUCTS USED TO CLEAN A BATHROOM
(Be sure all spray bottle tops are working and carry 1 spare sprayer top.)
- Tilex
- Spic and Span Disinfectant Cleaner
- Strategic Cleaner
- Bar Keeper’s Friend
- Comet Cream Cleanser
- Simple Green.
- Lysol toilet bowl cleaner
TOOLS USED TO CLEAN A BATHROOM
(Be sure all tools are clean and in working order. Sufficient bristles remain on brushes and feathers in duster. Be sure all sponges are clean. Over-used, smelly or grimy sponges need to be replaced.)
- White sponge Magic Eraser
- Yellow Sponge
- Long Duster
- Feather duster
- Black tile brush
- Whisk broom
- 2 blue glass cleaning towels, one damp and sprayed with disinfectant cleaner and one dry
- 2-4 Yellow microfiber towels
- 2 Red microfiber towels
- Sink brush
- Toilet brush
- Scraper
- Trash liners
ACTIONS USED TO CLEAN A BATHROOM
- Wipe- Clean or dry (something) by rubbing its surface with a cloth, a piece of paper, or one’s hand in one move
- Rub-Move one’s hand or a cloth repeatedly back and forth on the surface of (something) with firm pressure.
- Scrub- Firmly pressing hand while rapidly moving it back and forth generally using a brush or non-abrasive scrubbing pad
- Scour- Clean or brighten the surface of (something) firmly pressing hand while rapidly moving it back and forth generally using an abrasive tool or detergent.
CLEANING INSTRUCTIONS FOR APPROPRIATE PRODUCT, TOOL AND ACTION
TO USE WHEN CLEANING A SPECIFIC ITEM OR AREA
ITEMS NEEDED TO CLEAN
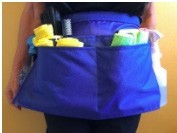
Apron
- Wipe between jobs with disinfectant cleaner and yellow microfiber cleaning cloth
- Put apron on as soon as you ready to clean the bathroom-Place tile/grout brush and scraper in your tool pocket.
- When finished scrubbing and before starting step 6, wiping and shining, place the following additional items in your apron
a. 2-4 yellow microfiber cleaning cloths
b. One blue damp glass cleaning cloth and one dry glass cleaning cloth
c. 2 red microfiber cleaning cloths
d. Whisk broom
e. Feather duster behind belt on apron back
f. Spic and Span Disinfectant cleaner in one of your apron loops.
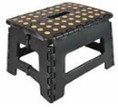
Step Stool
Always take into homes and use to reach any high area or item you cannot reach- Wipe between jobs with disinfectant cleaner and yellow microfiber cleaning cloth- FOR SAFETY REASONS NEVER STAND OR KNEEL ON ANY COUNTER – YOU CAN AND WILL BREAK THE COUNTER-TOP. OUR INSURANCE WILL NOT COVER THIS KIND OF BREAKAGE AND YOU WILL BE RESPONSIBLE FOR THE REPAIR
STEP 1
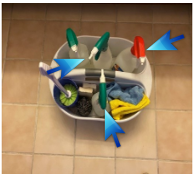
Carrying Caddy
Wipe between jobs with disinfectant cleaner and yellow microfiber cleaning cloth
| Be sure all sprayer bottle tops Are always pointing to the Middle of the caddy so they Do not drip on floors |
TRASH, RUGS AND MATS
If your Team Lead is not responsible for removing the mats, rugs and trash before starting to clean the bathroom then you must remove them.
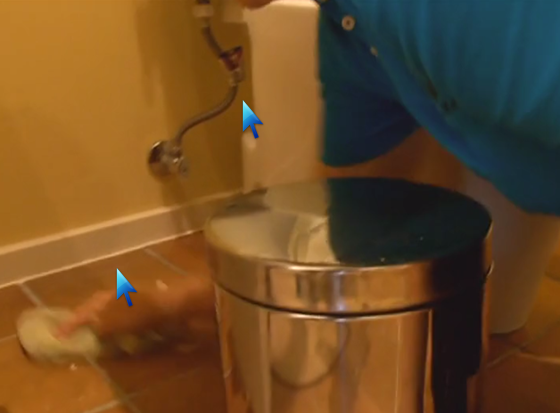
Trash
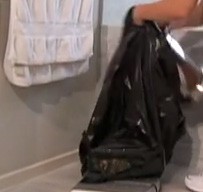
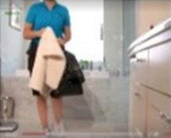
Remove and place the trash container outside the bathroom so the duster will be able to gather the trash. If they do not gather remove trash bag with trash, place outside door and put in new trash liner. Wipe inside of trash can when necessary. If extremely dirty clean in bathtub with scrubbing side of yellow sponge and wipe dry with yellow microfiber towel.
Rugs
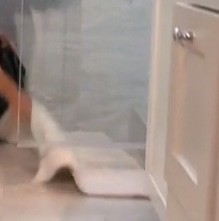
Shake mats/rugs on the floor and move them outside the room. Place them on the side in a tidy pile or roll it up when possible to avoid a trip hazzard or lay them flat in the next room for the person who will need to vacuum them
STEP 2
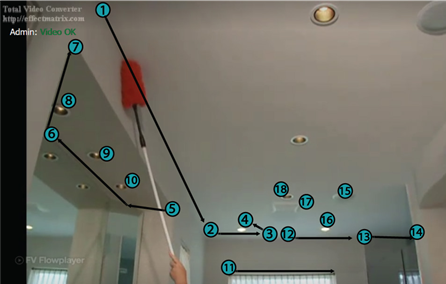
HIGH AND LOW LONG DUSTING
- Long dust a home every time you clean it unless wet wiping is required.
- Use your long duster to dust where the ceiling meets the wall as far as you can reach to the left and right without taking a step and then on the bottom being sure to clean everything you pass including wall inlets, tops of cabinets, top of windows, curtains, door ledges, baseboards, under cabinets and kickboards.
- Follow the numbers below to understand process for long dusting numerous items and areas without passing them
| Dust tops of all curtains And windows |
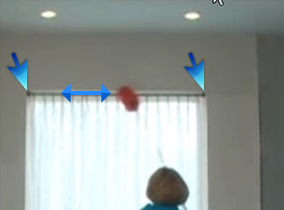
| Be sure to dust tops and bottoms of window frames |

| Low dust under each cabinet Kick plate |
| Dust visible baseboards, including behind and under furniture that can be reached without moving furniture |
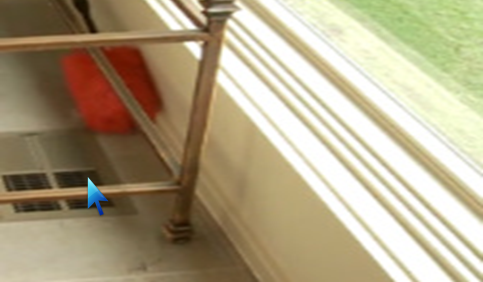
Vents
Always move bristles of brush in same direction as air vents-If the vent can be reached with your arm always use a whisk broom as first option
| Dust air vents in same direction as vents |
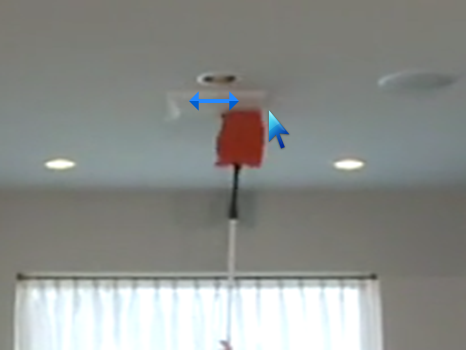
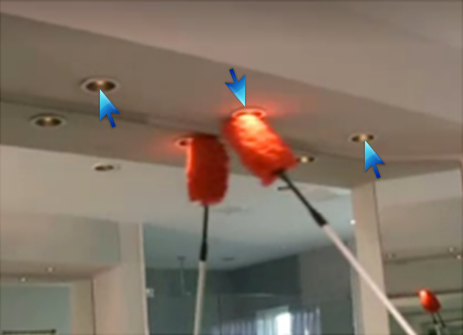
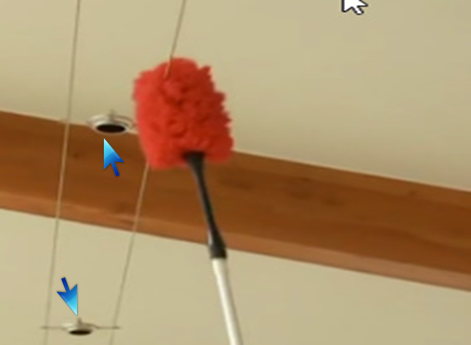
Can lighting
Place head of duster in can and spin lightly to remove all cob webs
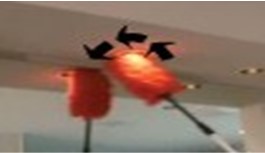
| Dust all recessed lights and light fixtures |
Light fixtures
Use long duster only for lights that cannot be reached with a feather duster. A feather duster will do a far better job of cleaning-If long duster is necessary be careful not to knock fixture off base while cleaning
| Be careful to not knock down light fixtures while dusting |
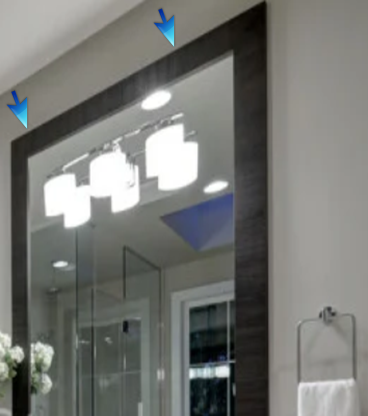
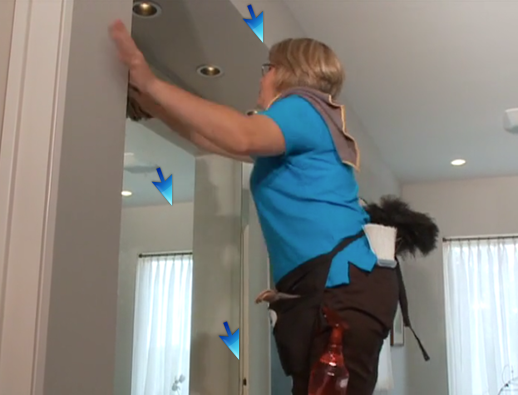
| High dust wood frames on tops of mirrors |
STEP 3
VACUUM
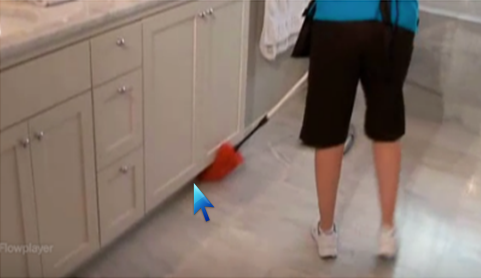
Use proper attachment with vacuum cleaner to vacuum hair from dry sinks, tubs, shower floors and hard to reach areas to remove hair and dust and then vacuum floor paying special attention behind the toilet.
| Use vacuum to remove hair from dry sink |
| Be sure to vacuum all hair, dust And debris where baseboards Meet floor and remove from baseboards |
STEP 4
PRETREAT SINKS, SHOWER, TUB AND TOILET
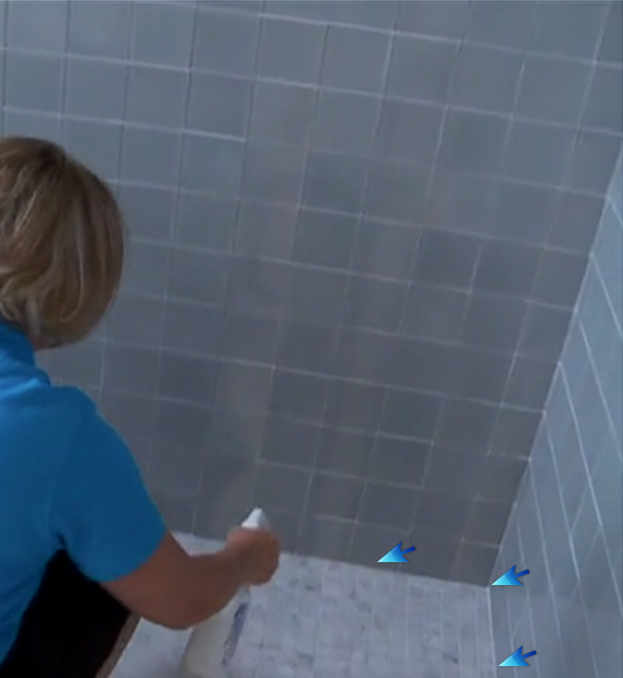
Spray simple green in sinks, showers and tubs and a small amount of Tilex where you see mildew. Place Lysol in toilet.
| Spray small amount of Tilex where there is mildew. Be careful not to spill Tilex on carpets and floors because we will need to replace them |
STEP 5
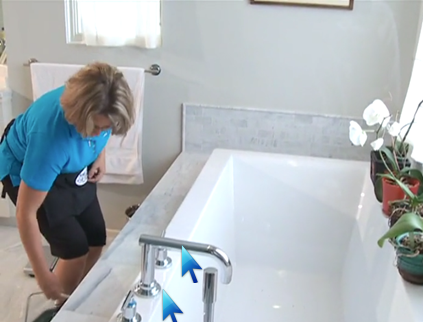
SCRUB SINKS, SHOWERS AND TUBS
SINKS
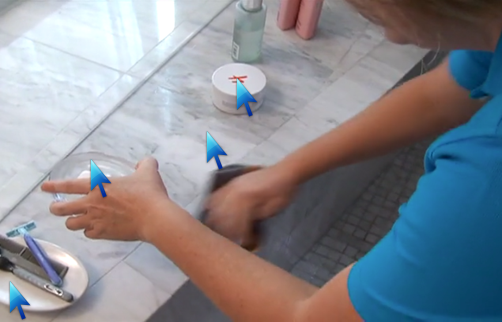
- Place a small amount of comet in sink area with scrubbing side of a yellow spongescrub sink to remove all soap scum. Too much cleanser is hard to rinse out
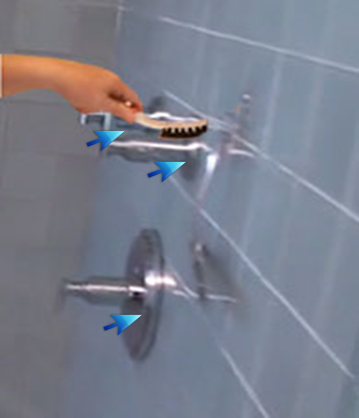
- Use black tile brush in apron pocket to clean around faucet bases and any connecting points,on counter corners, drain area and caulk area where the sink meets the counter-top or around outside of sink where sink is set in.
- If counter tops are extremely dirty or have hair spray on them use scrubbing side of yellow spongeto clean the vanity top and all the items on the counter-top
- Rinse sink area and counter tops with hotwater
- Do not dry
| Scrub sides and bottom of sink With scrubbing side of yellow Sponge. Using a small amount of comet when necessary |
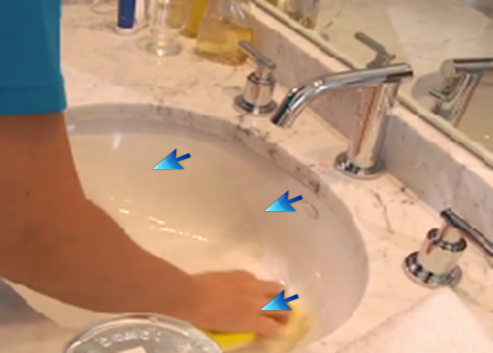
| Be sure to clean around all connections on fixtures. Be sure to clean the grout line in hanging sinks . |
| Be sure to clean back splash behind sink |
| Do not use too much cleanser because it takes too long to rinse |
| If very dirty pick up and clean under each item, clean item and rinse |
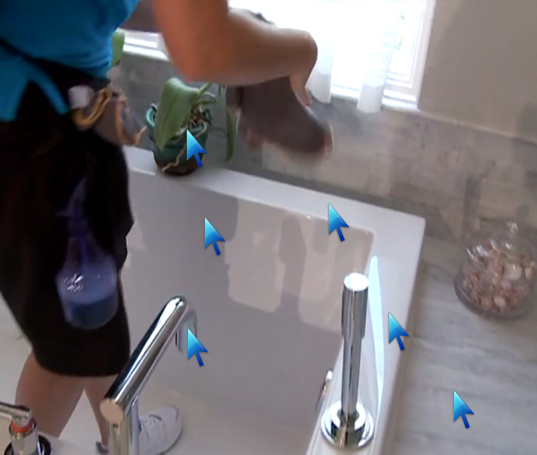
SHOWERS
Know your surfaces. On stone, marble or slate you can only use Spic and Span and a Cream Cleanser
- If there are few items in the shower pick them up, clean them, clean below them and put them back. If there are a lot of items in the shower remove all the items inside the shower area, soaps, shampoos etc. being careful to remember where everything was so you can put it back in its place.
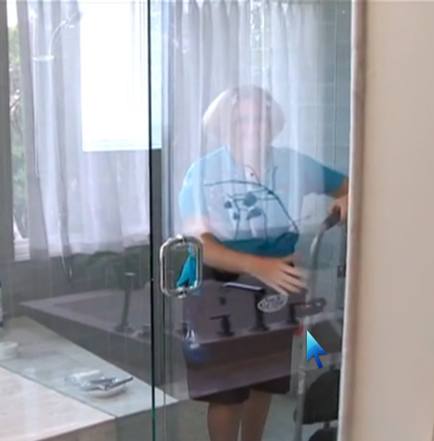
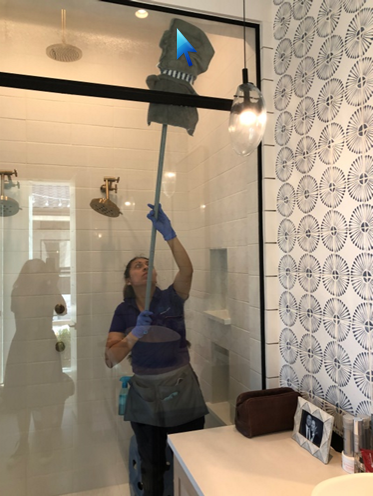
- If the shower walls and doors are higher than you can reach the top of then use a step ladder and complete this area first. You can usually go directly to step 6 for the high areas because they do not need scrubbing; only wiping to create a shine. You can also use a glass microfiber towel and a mop with a flat Velcro bottom to shine this area and not need a ladder. We still recommend cleaning this area before returning to scrubbing in case a ladder is necessary and you cannot have a wet floor and use any kind of ladder or stool.
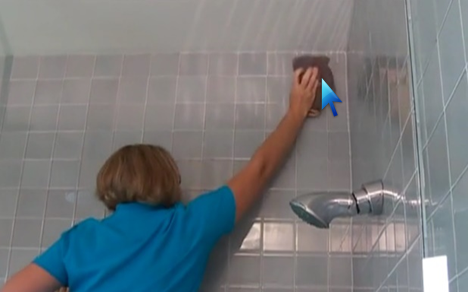
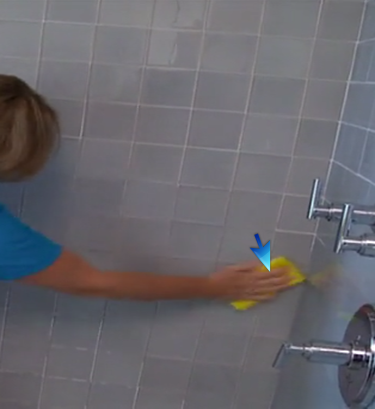
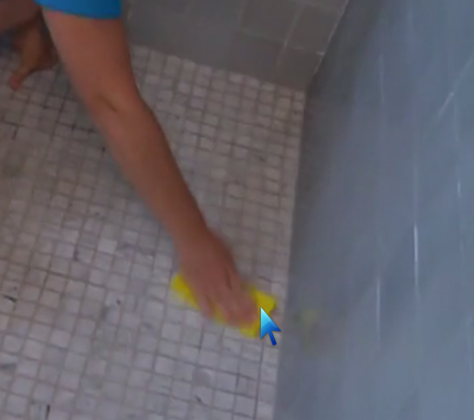
- Completely scrub the shower walls with the abrasive side of the yellow sponge, using a tile brush as needed in the corners and around edges removing any mildew buildup. Thoroughly scrub walls, in the crevices, corners, handles, grout lines, shower doors and the seal under the glass shower door.
- Use black tile brush in apron pocket around all fixtures and fixture connections.
- Use edge of yellow sponge and fit in shower track or black tile brush to clean shower door tracks.
- For area with rust or lime use comet and a yellow sponge.
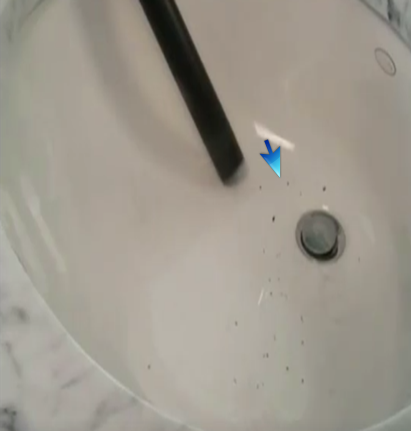
- Scrub floor of shower
- If the shower and tub has a plastic tub surround use your magic eraser to scrub area clean.
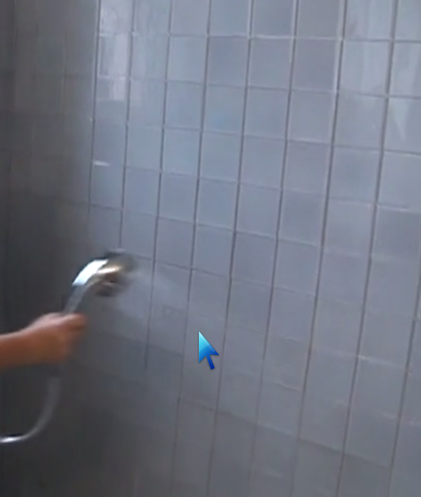
- Rinse shower thoroughly with hot water.
- Do not dry
| Only put a step ladder on a dry shower floor |
| Use a ladder on a dry shower floor to clean corners and wall tops of tall showers |
| Use a glass cleaning microfiber towel and a mop with Velcro flat head to attach towel to shine tall shower glass, doors and walls |
| Clean all soap dishes, shampoo bottles, etc. Pick them up, clean them and scrub below them. If there are an excessive amount of items remove from shower before scrubbing shower. |
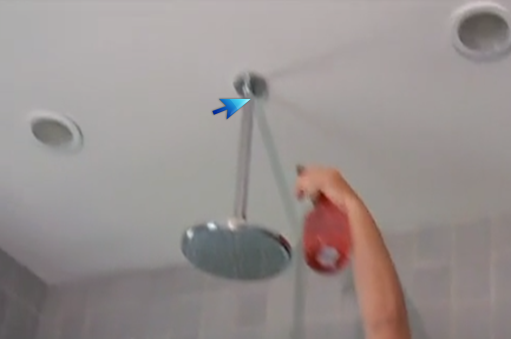
| Clean the shower head and if there is a hose connected to the shower head you must also clean the hose |
| Be sure to clean around shower fixtures with your tile brush |
| Scrub walls aggressively using a tile brush for grout when necessary |
| Scrub floor with comet and abrasive side of yellow sponge being careful to get into all corners |
| Use sprayer or mop bucket full of water and a quart pitcher with a handle to rinse the walls and floor of the shower |
TUBS (SOAKING AND JACCUZI)
- Clean any mats inside tub
- Remove all items in or around the tub area, leave all the items just outside the tub area
- Place a small amount of water in a cup. Wet your yellow sponge and place a small amount of comet on it and scrub the grout lines around the rim of the tub and any wall tile, dipping your sponge into the cup of water or adding comet to your sponge as needed. Clean the caulked area around the tub
- Continue this process to clean the inside of the tub. If the tub is heavily used use your white sponge magic eraser to clean the tub area
- Jacuzzi tubs – Use your black tile brush that is in your apron and clean around all faucets, their connections and the inside and around outsides of all jets.
- Rinse the tub really well with hot water
- Do not dry
| If there are jacuzzi jets clean jets and caulked area around the tub with black tile brush in your apron |
STEP 6
WIPING AND SHINING ALL AREAS IN BATHROOM
- Place your carrying caddy by the toilet
- Put one damp and one dry glass cleaning towel and 2-4 yellow microfiber cloths in your apron and place your Spic and Span disinfectant cleaner spray bottle on one apron loop. Place feather duster behind apron belt in back.
- Always begin with the door
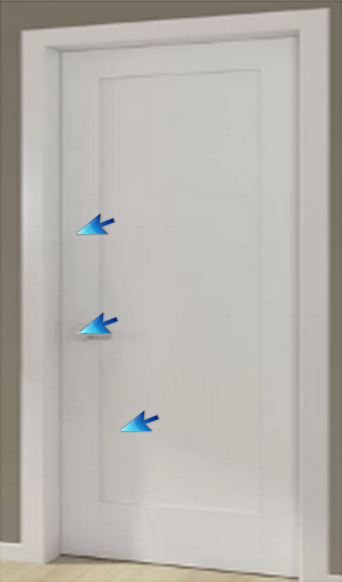
DOOR
- Use a feather duster to dust the door and the panels
- Spot clean dirty areas with damp yellow microfiber towel-If extra task damp wipe total door
- Always use disinfectant cleaner and a microfiber towel on and around handles
| Use feather duster to clean panels and door front (Wet wipe with microfiber towel if periodic task) removing any finger prints. For heavier soiled areas use scrubby side of yellow sponge On white doors only: Use magic eraser if you cannot get dirt off and If very dirty use black toothbrush to get corners Wet wipe the door handle and the area around the handle with Spic and Span disinfectant cleaner |
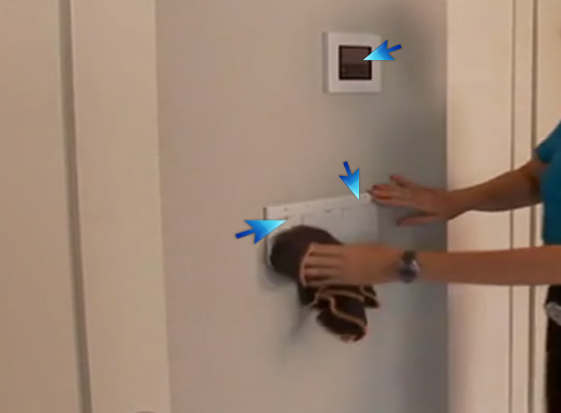
LIGHT SWITCH AND ELECTRICAL OUTLETS
- Wet wipe all switch plates with disinfectant cleaner and yellow microfiber towel. If extremely dirty spray Spic and Span Disinfectant cleaner on the black tile brush that is in your apron pocket and use to clean light switch. Then dry to shine with yellow microfiber cloth
- Clean all outlets and wall sockets as you come to them in your circle around the bathroom
- Clean Alarm Covers, sound system and temperature controls being careful not to make adjustments to them
| Always wet wipe switch plates, electrical outlets , alarm covers and temperature controls with Spic and Span disinfectant cleaner. They are touched regularly |
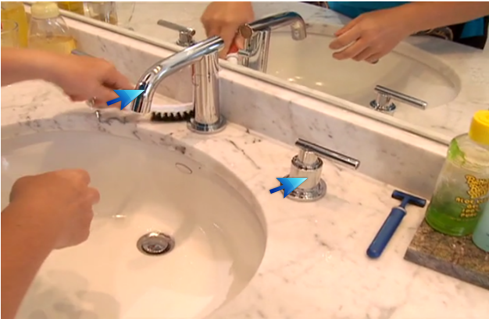
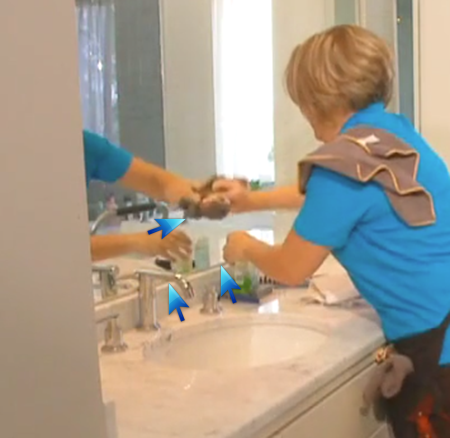
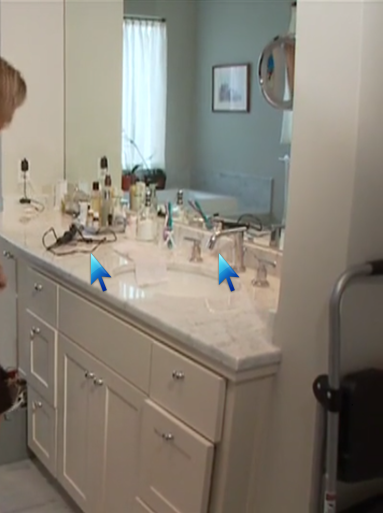
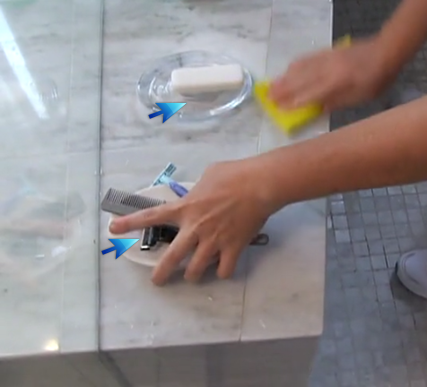
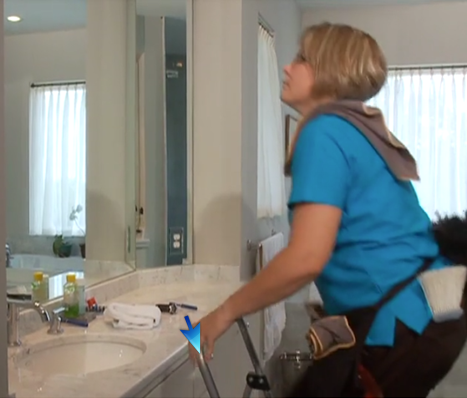
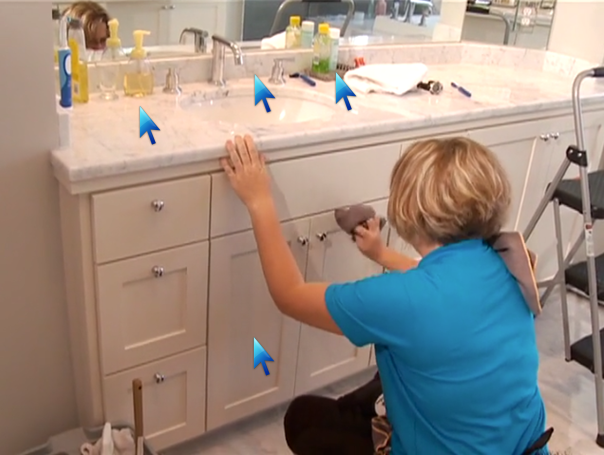
MIRRORS, SINK AND VANITY AREA
- Use your feather duster to clean the light fixture (top to bottom). Be sure to feather dust the light bulbs as well. Do not kneel or stand on the counter-top to clean the light fixture. Use your step stool to reach this area
- Clean the mirror using your glass towel. Turn all lights on, step away and check carefully looking at mirror in several directions and clear any streaks
- Wipe dry and shine the sink and faucets completely with a dry yellow microfiber towel. An extra spray of Spic and Span disinfectant cleaner might be needed on the fixtures to really make them shine
- Spot clean all cabinet fronts where needed with a damp yellow microfiber towel (wet wipe entire cupboard fronts when it is a periodic task)
- Use your glass towel to clean all mirrors or trays
- Look at the sink, faucets, drains and surrounding counter area to make sure all the lime, rust and hair is removed
| Always use a step ladder to reach the top of the mirror |
| When cleaning a mirror clean the outside and corners first and then clean the interior; like you are coloring. Corners and edges are often missed |
| Shine cabinet under each item then wipe off and replace in their original place. |
| Shine faucet and behind faucet area |
| Shine backsplash and all corners. Spot clean all cabinet fronts . |
BLINDS
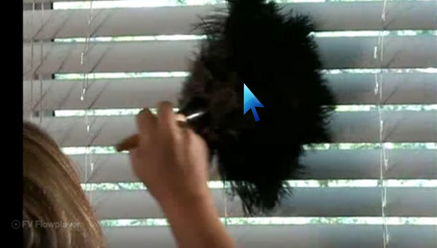
Dust blinds with feather duster cleaning in the same direction as the blind. Hold blind with one hand so they do not make noise and you can press harder. Clean strings in the same direction as the blind
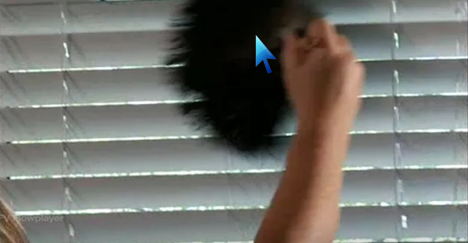
| Make sure to turn blinds to the opposite direction and dust the back of the blinds Gently lift blinds and dust window frame and sill Leave blinds exactly as you found them |
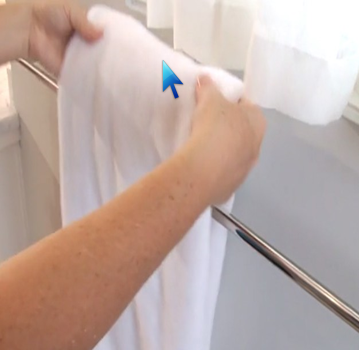
| Fold towels for finished look |
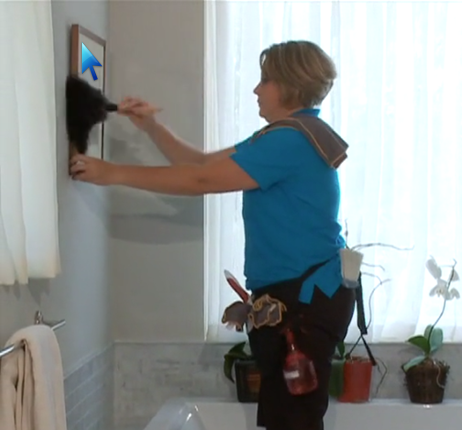
DUSTING
Dust any items you come to with your feather duster or yellow microfiber towel. If accessory is glass use glass cleaner cloth
| Dust all pictures holding the frame with one hand. Do not dust picture if there is no glass covering over the picture |
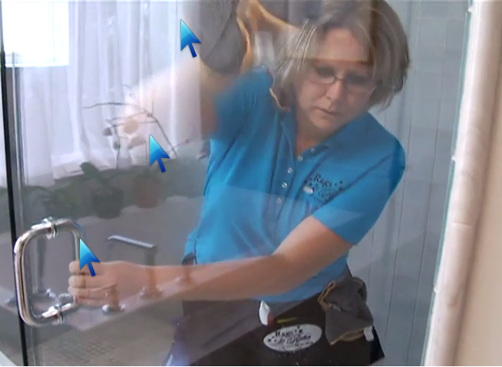
SHINING SHOWERS AND TUBS
SHOWER
| Use a blue microfiber glass cleaning cloth to clean and shine the bottom of the outside and inside glass shower doors |
| All items should be picked up, wiped off, wiped and put where they were found. Place shampoo bottles, etc with labels pointing out |
TUB
| Be sure to clean back splash behind tub |
| Pick up plants and clean below. Clean any decorative items and put back where you found them If a jacuzzi jets need to be dried and shined |
| Dry and shine walls, floors and outside of tub with Spic and Span disinfectant cleaner |
STEP 7
TOILET
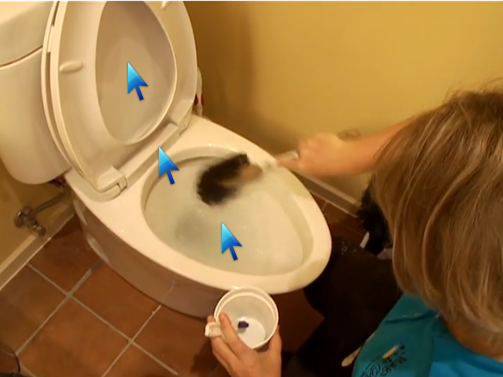
- Scrub the entire inside of the toilet with toilet brush.
- Check under the rim of the toilet from different angles to be sure it is clean
- Flush toilet once or twice if necessary when done cleaning inside.
- Check to make sure all the soil, rust and lime has been removed. If necessary, repeat the above steps to make sure the toilet bowl is completely cleaned on the inside and under the rim.
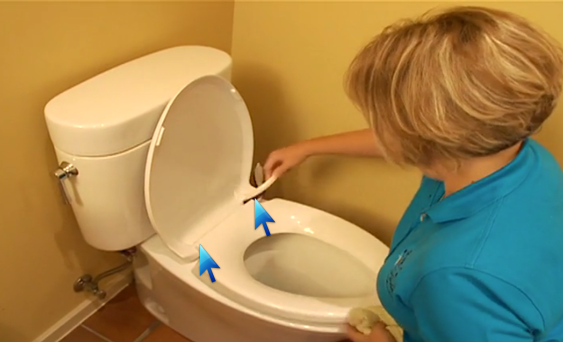
- Spray the commode bowl, lid, cover, tops and sides to the bottom base where the bolts are with Spic and Span disinfectant cleaner.
- Use the black tile brush in your carrying caddy labeled toilet brush to scrub the hinges and bolt caps of the toilet. Do not use the black tile brush in your apron.
- Begin wiping, drying and shining the top and sides, cover, lid, commode bowl and bottom of the toilet with a red microfiber towel
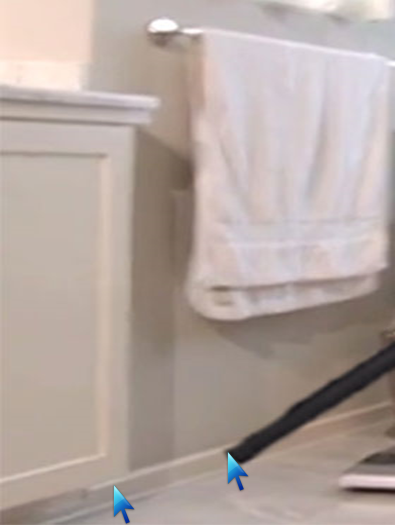
- Make sure to clean the floors around and behind the toilet, lots of hair and dust collect there-the earlier vacuuming should have captured majority of the hair and dust but now is the time to clean the floor around the toilet. A mop cannot reach in this area.
- Use a yellow microfiber towel to wipe off the toilet paper holder with gentle pressure as some can fall off the wall
- Fold toilet paper in a nice pointed fold for that “5 Star Look”.
| Start at top of toilet, wipe down the outside. Including hinges, toilet bowl, bolts and behind the toilet area |
| Be sure to clean all hinges with black tile toilet brush |
| Be sure to clean the floor around the toilet after you have cleaned the bottom of the toilet |
STEP 8
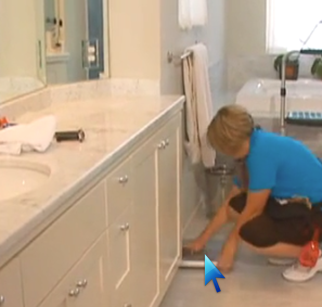
FLOORS
- If large bathroom use a mop if small bathroom do on hands and knees, being sure to use knee pads or a towel to kneel on.
- Starting at the commode clean the floors using yellow towels that have been soaked in water and floor cleaner
- Flip towels when dirty and take a new towel when both sides are dirty
- Pick up or move all items on the floor as you are mopping the floors.
- Be sure to get behind all doors
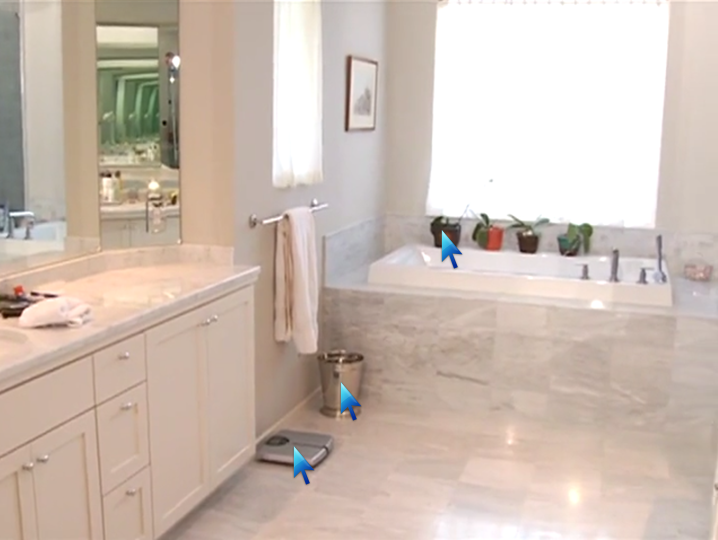
| Be sure you have cleaned top and under side of bathroom scale |
FINISHING TOUCHES
- If you took rugs out place all rugs back to their original location-if area is not completely dry wipe with a dry towel. Never trap moisture under mats/rugs
- If you took trash out place trash container back to its original location
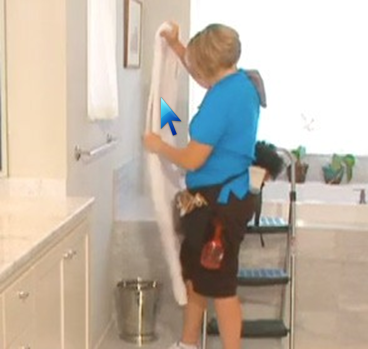
- Make sure all towels are folded and looking nice.
- Take a final look around the bathroom to make sure everything has been shined and no product or tool has been left behind
| Take a final look at bathroom to be sure nothing is out of place |